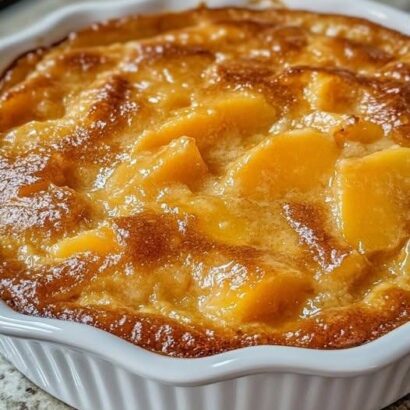
If you love the crunchy peanut butter center and rich chocolate coating of classic candy bars, these Butterfinger-style no-bake treats are sure to become a favorite. Made with crispy cornflakes, creamy peanut butter, a sweet candy-like base, and a smooth chocolate topping, these homemade treats deliver plenty of crunch without turning on the oven.
This easy no-bake dessert recipe is perfect for busy weekdays, holiday dessert trays, birthday parties, potlucks, and afternoon snacks. The ingredients are simple, the preparation is straightforward, and the finished bars look beautiful when cut into neat squares.
Whether you’re looking for an easy homemade candy recipe or a quick chocolate peanut butter dessert, these crunchy bars are a delicious option to keep in your recipe collection.
Why You’ll Love These No-Bake Butterfinger Treats
- No oven required: Prepare the bars on the stovetop and let the refrigerator do the rest.
- Crunchy texture: Cornflakes provide a crisp bite that contrasts beautifully with the creamy peanut butter.
- Rich chocolate topping: Melted chocolate creates a smooth, satisfying finish.
- Simple ingredients: Most ingredients are easy to find at the grocery store.
- Perfect for sharing: Cut the finished slab into squares for parties, bake sales, or homemade food gifts.
Ingredients
For the Crunchy Peanut Butter Base
- 1 cup light corn syrup
- 1 cup granulated sugar
- 1¼ cups creamy peanut butter
- 8 cups cornflakes cereal
For the Chocolate Topping
- 1½ cups semisweet chocolate chips
- ¼ cup creamy peanut butter
- 1 teaspoon coconut oil, optional
Equipment: A 9 × 13-inch baking pan, parchment paper, a large saucepan, a mixing bowl, and a spatula.
How to Make Butterfinger-Style No-Bake Treats
Step 1: Prepare the Baking Pan
Line a 9 × 13-inch baking pan with parchment paper, leaving a little overhang along the sides. This makes it easier to lift out the finished bars once they have chilled.
Set the pan aside while you prepare the peanut butter mixture.
Step 2: Heat the Sugar and Corn Syrup
Combine the corn syrup and granulated sugar in a large saucepan.
Cook over medium heat, stirring continuously, until the sugar dissolves and the mixture just begins to bubble around the edges.
Remove the saucepan from the heat as soon as the mixture starts bubbling. Avoid boiling it for too long, as excessive heating can make the finished bars overly hard.
Be careful when working with hot sugar syrup because it can cause burns.
Step 3: Stir in the Peanut Butter
Immediately add the creamy peanut butter to the warm sugar mixture.
Stir until the peanut butter melts into the syrup and the mixture becomes smooth and evenly combined.
The peanut butter creates the rich, nutty flavor that makes these homemade candy bars so satisfying.
Step 4: Add the Cornflakes
Place the cornflakes in a large heatproof mixing bowl.
Pour the warm peanut butter mixture over the cereal and gently fold everything together with a spatula. Continue mixing until most of the cornflakes are coated.
Try not to crush the cereal too much. Keeping some larger flakes intact helps create the signature crunchy texture.
Step 5: Press the Mixture Into the Pan
Transfer the coated cornflakes to the prepared baking pan.
Using a lightly greased spatula, press the mixture into an even layer. Apply enough pressure to help the bars hold together, but avoid crushing the cereal completely.
Set the pan aside while you prepare the chocolate topping.
Step 6: Melt the Chocolate
Place the semisweet chocolate chips and ¼ cup peanut butter in a microwave-safe bowl.
Microwave in 20-second intervals, stirring after each interval, until the chocolate is mostly melted. Continue stirring until the mixture becomes smooth.
If desired, add the coconut oil to help create a glossy topping.
You can also melt the chocolate in a heatproof bowl set over a saucepan of gently simmering water.
Step 7: Spread the Chocolate Topping
Pour the melted chocolate mixture over the cornflake base.
Use a spatula to spread it evenly from edge to edge, creating a smooth chocolate layer.
For an extra decorative finish, sprinkle a few lightly crushed cornflakes over the chocolate before it sets.
Step 8: Chill Until Firm
Place the pan in the refrigerator for at least 1 hour, or until the chocolate topping is completely set and the base holds together.
Once chilled, lift the slab out using the parchment paper and transfer it to a cutting board.
Cut into 12–16 bars or smaller bite-sized squares with a sharp knife.
For cleaner cuts, allow the pan to sit at room temperature for a few minutes before slicing.
Recipe Details
- Prep time: 20 minutes
- Cook time: 5–10 minutes
- Chilling time: 1 hour
- Total time: Approximately 1 hour 30 minutes
- Yield: 12–16 bars
- Difficulty: Easy
Tips for the Best No-Bake Butterfinger Bars
Use regular creamy peanut butter. Conventional peanut butter generally gives the base a more consistent texture than natural peanut butter, which may separate and release excess oil.
Don’t overheat the sugar mixture. Heating the syrup only until it begins to bubble helps prevent the base from becoming too hard once cooled.
Keep the cereal crunchy. Fold the ingredients together gently instead of crushing the cornflakes into fine crumbs.
Press the mixture evenly. An even base makes the bars easier to cut and ensures that each piece has a similar thickness.
Let the chocolate set completely. Chilling the bars before slicing helps the topping stay neat and prevents the squares from falling apart.
Easy Variations
Milk Chocolate Peanut Butter Bars
Replace the semisweet chocolate chips with milk chocolate chips for a sweeter, creamier topping.
Extra Crunchy Butterfinger Treats
Fold ½ cup of finely chopped roasted peanuts into the cereal mixture for extra crunch and a stronger nutty flavor.
Chocolate Drizzle Version
After the main chocolate layer has set, drizzle melted white chocolate over the top for a decorative finish.
Mini No-Bake Candy Bites
Instead of pressing the mixture into a pan, form small clusters using a spoon and place them on a parchment-lined tray. Drizzle with melted chocolate and refrigerate until firm.
Homemade Butterfinger-Inspired Candy
For a different version with a more candy-like center, melted candy corn and peanut butter can be combined and coated in chocolate. This creates a different texture from the cornflake bars in this recipe.
How to Store Butterfinger-Style Treats
Store the bars in an airtight container to protect their crunchy texture.
- Room temperature: Keep in a cool room for up to 3 days, provided the chocolate remains firm and the environment is not hot.
- Refrigerator: Store for up to 1 week in an airtight container.
- Freezer: Freeze in a sealed, freezer-safe container for up to 2 months. Separate layers with parchment paper.
If frozen, thaw the bars in the refrigerator before serving.
Frequently Asked Questions
Do these Butterfinger-style treats need baking?
No. The base is prepared on the stovetop, and the chocolate topping sets in the refrigerator. This makes the recipe convenient when you want a homemade dessert without using an oven.
Why are my no-bake bars too hard?
The sugar and corn syrup mixture may have been heated for too long. Remove it from the heat as soon as it begins to bubble, then stir in the peanut butter promptly.
Why are my bars falling apart?
The cereal may not have been coated evenly, or the mixture may not have been pressed firmly enough into the pan. Make sure the peanut butter mixture covers the cornflakes and allow the bars to chill completely before cutting.
Can I make these treats ahead of time?
Yes. These bars are ideal for making ahead because they need time to chill. Prepare them the day before a party and keep them in an airtight container until ready to serve.
Can I use a different cereal?
Cornflakes provide a crisp texture that works especially well in this recipe. Other crispy cereals may work, but the flavor and consistency will be different.
Final Thoughts
These Butterfinger-style no-bake treats combine crunchy cornflakes, creamy peanut butter, and a smooth chocolate topping to create an easy homemade dessert everyone can enjoy.
They’re simple enough for an everyday sweet treat and attractive enough for holiday dessert platters, parties, and potlucks. With no oven required and only a short preparation time, these chocolate peanut butter bars are a practical choice whenever you’re craving something sweet and crunchy.
Make a batch ahead, chill until firm, and enjoy these delicious homemade candy-inspired treats straight from the refrigerator.