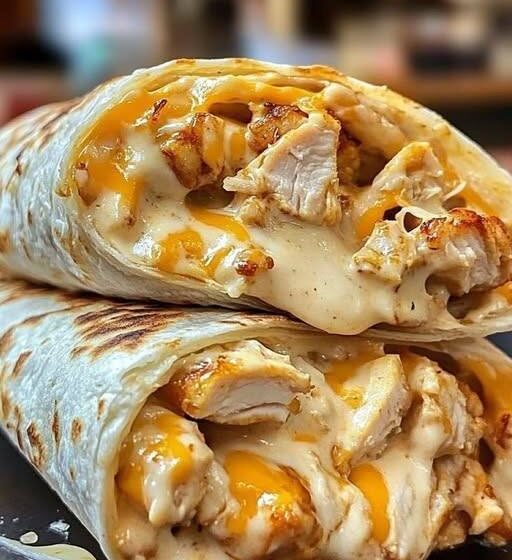
If you’re looking for an easy chicken dinner that feels special without requiring complicated cooking techniques, these Cheesy Garlic Chicken Roll-Ups are a perfect choice. Tender chicken breasts are filled with a creamy garlic and cheese mixture, rolled tightly, and baked until golden and bubbling. The result is a comforting, flavorful meal that works just as well for a busy weeknight dinner as it does for a family gathering.
The combination of juicy chicken, melted cheese, garlic, and Italian-inspired seasonings makes every bite incredibly satisfying. This recipe also uses simple ingredients that you can easily find at most grocery stores, making it a convenient option when you want a homemade meal without spending hours in the kitchen.
Why You’ll Love These Chicken Roll-Ups
These cheesy chicken roll-ups are easy to prepare and packed with flavor. The creamy cheese filling keeps the chicken moist while garlic, Italian seasoning, and Parmesan add extra depth.
They are also versatile. You can serve them with roasted vegetables, mashed potatoes, pasta, rice, or a fresh green salad. If you’re building a collection of easy family dinner recipes, this one deserves a place on the list.
Ingredients
For the chicken:
- 4 boneless, skinless chicken breasts
- 1 tablespoon olive oil
- 1 teaspoon Italian seasoning
- 1/2 teaspoon paprika
- 1/2 teaspoon salt
- 1/4 teaspoon black pepper
For the cheesy garlic filling:
- 4 ounces (115 g) cream cheese, softened
- 1 cup shredded mozzarella cheese
- 1/3 cup grated Parmesan cheese
- 3 cloves garlic, finely minced
- 2 tablespoons chopped fresh parsley
- 1/2 teaspoon Italian seasoning
- 1/4 teaspoon black pepper
For the topping:
- 1/2 cup shredded mozzarella cheese
- 2 tablespoons grated Parmesan cheese
- 1 tablespoon melted butter
- 1/2 teaspoon garlic powder
- 1 tablespoon chopped fresh parsley
How to Make Cheesy Garlic Chicken Roll-Ups
1. Prepare the Chicken
Preheat your oven to 375°F (190°C). Lightly grease a 9-by-13-inch baking dish with cooking spray or a small amount of olive oil.
Place each chicken breast between two sheets of plastic wrap or parchment paper. Using a meat mallet, gently pound the chicken until it is about 1/4 inch thick. Try to make the pieces as even as possible so they cook uniformly.
Season both sides of the chicken with salt, black pepper, paprika, and Italian seasoning.
2. Make the Garlic Cheese Filling
In a medium bowl, combine the softened cream cheese, shredded mozzarella, Parmesan, minced garlic, parsley, Italian seasoning, and black pepper.
Mix until everything is evenly incorporated and you have a creamy, spreadable filling.
For an even richer flavor, you can add a small pinch of red pepper flakes if you enjoy a little heat.
3. Fill and Roll the Chicken
Spread approximately 2 to 3 tablespoons of the cheese mixture over each flattened chicken breast. Leave a small border around the edges to help prevent the filling from escaping during baking.
Starting from one short end, carefully roll each chicken breast into a tight cylinder.
Place the chicken roll-ups seam-side down in the prepared baking dish. This helps keep them closed while they bake.
4. Add the Cheesy Topping
In a small bowl, combine the melted butter and garlic powder.
Brush the tops of the chicken roll-ups lightly with the garlic butter. Sprinkle the remaining mozzarella and Parmesan over the chicken.
The cheese will melt during baking and create a delicious golden topping.
5. Bake
Place the baking dish in the preheated oven and bake for approximately 25 to 30 minutes, or until the chicken reaches an internal temperature of 165°F (74°C).
If you want a more golden and bubbly cheese topping, switch the oven to broil for the final 1 to 2 minutes. Watch carefully because the cheese can brown quickly.
Allow the chicken to rest for about 5 minutes before serving.
What to Serve With Cheesy Garlic Chicken Roll-Ups
These chicken roll-ups are rich and flavorful, so they pair beautifully with lighter side dishes.
Try serving them with:
- Garlic mashed potatoes
- Roasted broccoli
- Steamed green beans
- Buttered rice
- Creamy pasta
- Roasted asparagus
- Caesar salad
- Garlic bread
- Fresh garden salad
For an easy weeknight dinner, roasted vegetables and a simple salad are excellent choices. For a more indulgent meal, serve the chicken with creamy mashed potatoes and homemade garlic bread.
Tips for the Best Chicken Roll-Ups
Pound the chicken evenly: Thin, evenly sized chicken breasts roll more easily and cook more consistently.
Don’t overfill them: Too much cheese filling can spill out during baking. A few tablespoons per chicken breast is usually enough.
Use softened cream cheese: Soft cream cheese combines much more easily with the other ingredients.
Secure the rolls if necessary: If your chicken breasts do not stay rolled, you can use toothpicks to secure them. Remember to remove the toothpicks before serving.
Use a meat thermometer: Chicken is safely cooked when the thickest part reaches 165°F (74°C). This is one of the easiest ways to avoid both undercooked and dry chicken.
Recipe Variations
Want to customize this easy chicken recipe? There are several ways to change the filling.
For a spinach and cheese version, add 1/2 cup of finely chopped cooked spinach to the cream cheese mixture.
For a spicy chicken roll-up, add 1/4 teaspoon of red pepper flakes or a little chopped jalapeño.
For a bacon version, mix 1/3 cup of cooked and crumbled bacon into the cheese filling.
You can also replace some of the mozzarella with cheddar, provolone, or Monterey Jack cheese.
Storage and Reheating
Store leftover chicken roll-ups in an airtight container in the refrigerator for up to 3 days.
To reheat, place them in a covered baking dish and warm them in a 350°F (175°C) oven until heated through. You can also use a microwave, but reheating in the oven generally helps maintain the texture of the melted cheese.
If you’re preparing meals ahead of time, these roll-ups can be assembled earlier in the day, covered, and refrigerated until you’re ready to bake them.
Frequently Asked Questions
Can I use chicken thighs?
Yes. Boneless, skinless chicken thighs can work, although they are more difficult to flatten and roll than chicken breasts. Chicken breasts are generally easier for this particular recipe.
Can I prepare these chicken roll-ups ahead of time?
Yes. Assemble the roll-ups, place them in the baking dish, cover, and refrigerate until you’re ready to cook. Add a few extra minutes to the cooking time if they go directly from the refrigerator into the oven.
How do I keep the cheese from leaking out?
Avoid overfilling the chicken and roll it tightly. Placing the rolls seam-side down also helps keep the filling inside.
Can I freeze Cheesy Garlic Chicken Roll-Ups?
For the best texture, it’s recommended to freeze the cooked chicken rather than freezing the assembled raw roll-ups. Cool completely, wrap individual portions well, and store them in a freezer-safe container.
Final Thoughts
These Cheesy Garlic Chicken Roll-Ups turn simple chicken breasts into a delicious restaurant-style meal that you can easily make at home. With tender seasoned chicken, creamy garlic cheese filling, and a golden melted-cheese topping, this recipe is perfect for anyone searching for an easy chicken dinner, family-friendly meal, or comforting homemade recipe.
Whether you’re preparing a quick weeknight dinner or looking for something impressive for guests, these cheesy chicken roll-ups are an easy recipe you’ll want to make again.