SEO Title: Easy Peanut Butter Bars with Chocolate Frosting – No-Bake Recipe
Meta Description: These easy peanut butter bars feature a rich, creamy peanut butter base and smooth chocolate frosting. Make this delicious homemade dessert with simple ingredients!
Primary Keyword: peanut butter bars
Related Keywords: easy peanut butter dessert, chocolate peanut butter bars, homemade peanut butter squares, creamy peanut butter bars, no-bake peanut butter bars, peanut butter dessert recipe.
Easy Peanut Butter Bars
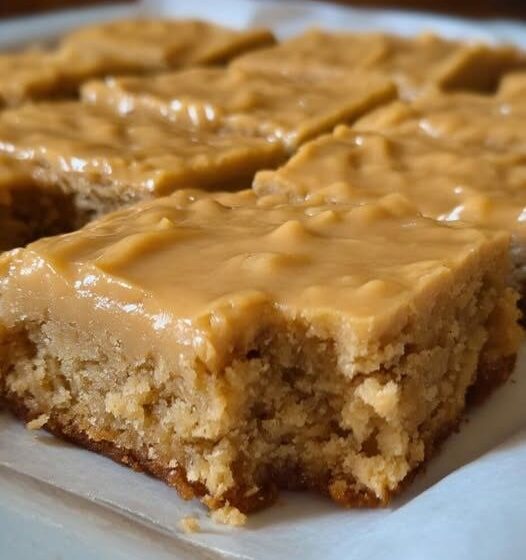
If you love the rich taste of peanut butter and the sweetness of creamy frosting, these homemade peanut butter bars are the perfect dessert. Soft, slightly chewy, and full of nutty flavor, each square combines a smooth peanut butter base with a luscious chocolate topping that melts in your mouth.
These bars are ideal for busy days when you want something homemade without spending hours in the kitchen. Made with everyday ingredients, they are easy to prepare, simple to slice, and perfect for sharing with family and friends.
Whether you’re preparing a dessert for a potluck, a holiday gathering, a bake sale, or an afternoon treat, these peanut butter bars are guaranteed to satisfy your sweet tooth. The best part is that you don’t need complicated baking techniques to achieve a delicious result.
This version uses a no-bake peanut butter base topped with a smooth chocolate frosting, creating a dessert that tastes indulgent while remaining wonderfully simple to prepare.
Why You’ll Love These Peanut Butter Bars
- Easy to make: Simple steps make this recipe suitable for beginner home cooks.
- Rich peanut butter flavor: Creamy peanut butter gives every bite a delicious nutty taste.
- Smooth chocolate topping: The chocolate layer adds sweetness and balances the peanut butter.
- Perfect for sharing: Cut the bars into small squares for parties, picnics, and dessert trays.
- Make-ahead friendly: Prepare them in advance and chill until you’re ready to serve.
Recipe Information
- Prep Time: 20 minutes
- Chilling Time: 2 hours
- Total Time: 2 hours 20 minutes
- Servings: 16 bars
- Course: Dessert
- Method: No-bake
Ingredients
For the Peanut Butter Base
- 1 cup creamy peanut butter
- ½ cup unsalted butter, melted
- 2 cups powdered sugar
- 1 teaspoon vanilla extract
- 1 ½ cups graham cracker crumbs
- ¼ teaspoon salt, optional
For the Chocolate Frosting
- 1 cup semisweet chocolate chips
- ¼ cup creamy peanut butter
- 2 tablespoons unsalted butter
- 2 tablespoons heavy cream, optional, for a softer and creamier topping
Ingredient tip: Use conventional creamy peanut butter rather than natural peanut butter with a separated layer of oil. This helps the bars hold together and gives the base a smoother texture.
How to Make Peanut Butter Bars
Step 1: Prepare the Baking Pan
Line an 8-by-8-inch square baking pan with parchment paper, leaving some overhang on two sides. This will make it easier to lift the chilled bars out of the pan.
Lightly grease the parchment if needed.
Step 2: Make the Peanut Butter Mixture
In a large mixing bowl, combine the creamy peanut butter, melted butter, and vanilla extract. Stir until smooth and well blended.
Add the powdered sugar, graham cracker crumbs, and salt if using. Mix thoroughly until the ingredients form a thick, slightly crumbly dough that holds together when pressed.
If the mixture seems too dry, add another tablespoon of peanut butter. If it feels too soft, mix in a little additional graham cracker crumbs.
Step 3: Press the Base into the Pan
Transfer the peanut butter mixture to the prepared pan.
Use a spatula or the bottom of a measuring cup to press it firmly into an even layer. Pay particular attention to the corners so the bars have a consistent thickness.
Place the pan in the refrigerator while you prepare the chocolate topping.
Step 4: Prepare the Chocolate Frosting
Place the chocolate chips, peanut butter, and butter in a microwave-safe bowl.
Microwave at 50% power in 20–30-second intervals, stirring after each interval, until the mixture is smooth and melted. Avoid overheating the chocolate.
For an extra-creamy topping, stir in the heavy cream after melting. Mix until glossy and evenly combined.
Alternatively, melt the ingredients in a heatproof bowl set over a saucepan of gently simmering water, making sure the bottom of the bowl does not touch the water.
Step 5: Add the Chocolate Layer
Remove the peanut butter base from the refrigerator.
Pour the melted chocolate mixture over the base and spread it evenly with a spatula. Gently tilt the pan if necessary to help the topping reach every corner.
For a decorative finish, create light swirls with the tip of a knife before the chocolate begins to set.
Step 6: Chill Until Firm
Refrigerate the pan for approximately 2 hours, or until the chocolate topping is firm and the peanut butter layer holds its shape.
Once set, lift the slab from the pan using the parchment paper. Place it on a cutting board and allow it to sit for a few minutes before slicing.
Use a sharp knife to cut the slab into 16 squares. For cleaner edges, warm the knife under hot water, wipe it dry, and cut gently. Repeat between cuts.
Serve chilled or allow the bars to sit at room temperature briefly for a softer texture.
Tips for the Best Peanut Butter Bars
Measure the powdered sugar carefully. Too little sugar may leave the base too soft, while too much can make it dry and crumbly.
Press the base firmly. A compact base is less likely to fall apart when sliced.
Melt chocolate slowly. Short microwave intervals and frequent stirring help prevent scorching and produce a smooth topping.
Allow enough chilling time. Cutting the bars before they are fully set can cause the chocolate layer to crack or smear.
Use a sharp knife. A warm, dry knife creates cleaner squares and helps keep the chocolate topping intact.
Adjust the sweetness. Semisweet chocolate provides a pleasant contrast to the sweet peanut butter base. Dark chocolate is another excellent choice if you prefer a less-sweet dessert.
Delicious Variations
Crunchy Peanut Butter Bars
Replace the creamy peanut butter with crunchy peanut butter for extra texture. You can also add ¼ cup of finely chopped roasted peanuts to the base.
Peanut Butter and Milk Chocolate Bars
Use milk chocolate chips instead of semisweet chocolate for a sweeter, creamier topping that children may particularly enjoy.
Peanut Butter Oat Bars
Replace ½ cup of the graham cracker crumbs with quick oats. The texture will be slightly heartier, with a subtle oat flavor.
Chocolate Peanut Butter Swirl Bars
Reserve 2 tablespoons of melted peanut butter and drizzle it over the chocolate topping. Use a toothpick to create a decorative swirl before chilling.
Salted Peanut Butter Bars
Sprinkle a small pinch of flaky sea salt over the chocolate layer before it sets. The salt enhances the peanut butter flavor and balances the sweetness.
Peanut Butter Cookie Bars
Replace the graham cracker crumbs with finely crushed vanilla sandwich cookies or peanut butter cookies. Adjust the mixture if necessary so the base remains firm enough to slice.
How to Serve Peanut Butter Bars
These bars are delicious on their own, but you can also serve them in several creative ways.
- With a glass of cold milk: A classic pairing that complements the rich peanut butter and chocolate.
- With vanilla ice cream: Serve a square alongside a scoop of ice cream for a more indulgent dessert.
- On a dessert platter: Arrange the bars with brownies, cookies, and other bite-sized sweets.
- With fresh strawberries: The fruity flavor provides a refreshing contrast to the richness of the bars.
- As an afternoon treat: Enjoy a small square with coffee or tea.
For parties, cut the bars into smaller pieces so guests can sample them alongside other desserts.
Storage Instructions
Refrigerator: Store the bars in an airtight container in the refrigerator for up to 1 week. Separate layers with parchment paper to prevent sticking.
Freezer: Arrange the bars in a single layer until firm, then transfer them to a freezer-safe container with parchment between layers. Freeze for up to 3 months for best quality.
Thawing: Allow frozen bars to thaw in the refrigerator or at room temperature until they reach your preferred texture.
Because this recipe contains butter and may include cream in the topping, refrigerate the bars rather than leaving them out for extended periods.
Frequently Asked Questions
Do peanut butter bars need to be baked?
No. This recipe uses graham cracker crumbs to create a firm base without baking. Chilling helps the mixture set and makes the bars easy to cut.
Why are my peanut butter bars crumbly?
The mixture may contain too many dry ingredients or insufficient peanut butter. Add a little extra peanut butter, mix well, and press the base firmly into the pan.
Why is my chocolate topping cracking?
The chocolate may be too cold or too firm when you cut the bars. Let the pan sit at room temperature for a few minutes before slicing, and use a warm, dry knife.
Can I use natural peanut butter?
Conventional creamy peanut butter usually produces more consistent results because it has a stable texture. Natural peanut butter can work if thoroughly stirred, but the base may be softer or more oily.
Can I make these peanut butter bars ahead of time?
Absolutely. Prepare them a day or two before serving and keep them covered in the refrigerator. Slice them shortly before serving for the neatest presentation.
Can I make this recipe gluten-free?
Yes. Use certified gluten-free graham cracker crumbs or gluten-free cookies, and check the labels on the remaining ingredients to ensure they meet your dietary needs.
How do I make the bars less sweet?
Use dark chocolate with a higher cocoa percentage and add a small pinch of salt to the peanut butter base. You can also reduce the powdered sugar slightly, although this may change the firmness of the bars.
Final Thoughts
These easy peanut butter bars are the perfect combination of creamy, nutty, and chocolatey flavors. With a soft peanut butter base and a smooth chocolate frosting, they deliver all the satisfaction of a homemade dessert without the need to turn on the oven.
They’re simple enough for everyday snacking, attractive enough for a party dessert tray, and convenient to prepare ahead of time. Customize them with crunchy peanuts, dark chocolate, or a sprinkle of sea salt to create your own favorite version.
Save this easy peanut butter bars recipe for your next dessert craving, and enjoy a delicious homemade treat with every bite!